Sending an email to wish your customers a happy birthday it’s usually a thing that big companies do. There is a good reason for that, it’s an expensive upgrade to the system you are using, or simply you need to get an external app and pay a monthly subscription.
But, you can make your own system for free using only a simple script and a Google Spreadsheet. This automated e-card sender uses a simple Google script to select the customers from the sheet that have a birthday today, and send them a customized happy birthday ecard. This script runs daily using a time trigger. The happy birthday ecard template is included in the script as an extra HTML file, I have included 3 templates, you can modify them, add your logo and text, and also you can add more templates.
Don’t get scared because the solution uses a script, it’s very easy to implement. There are two ways to implement this solution; the first one is straightforward, you just need to make a copy of my spreadsheet and then add the customers with their dates of birth and emails. The second one is to copy the script and the birthday e-card templates to your spreadsheet, probably the one already holding the customer’s data, and adjust the location of the specific data (Name, Surname, DOB, and email). After this, all you need to do is just set up a daily trigger and let the script do the rest.
How to implement – the easy way
I don’t need to post the script here, so if you are here for the script just scroll down for the next section.
- Level of knowledge needed to implement this solution:
- Google Script: none
- Google Spreadsheet: Beginner level.
To implement this solution first you will make a copy of my spreadsheet in your Drive, then access the script editor and run the script to accept the permissions and add a trigger that will run the script on daily basis. After this, you can customize the ecards with your logo and text.
Make a copy of my Spreadsheet
Here is the link to my spreadsheet, the link will automatically make a copy of the spreadsheet to your Drive: Automated e-card sender spreadsheet.
Now, you will have a copy of my spreadsheet in your drive, together with the script and the HTML ecards templates. I have prepared 3 templates, but you can add more. The next step is to:
Test the script
First, add your email address in the email column and set the birthdate to today. Next, open the script by selectin the “Script editor” item from the “Tools” menu.
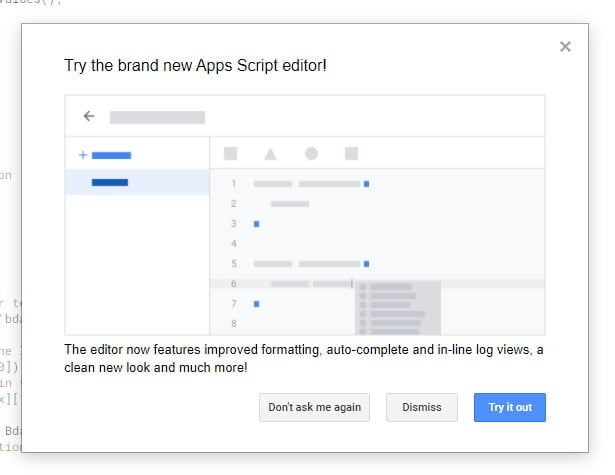
If you are opening the script editor for the first time, you probably going to be greeted by a message to try the new Apps Script editor, I suggest to “Try it out”, it will be much easier to work with.
Next thing is to run the script, accept permissions and see the test result. So, locate the Run button, press it, accept permissions, and hopefully, you will get an email with the happy birthday ecard.
If you are having problems with “Review and Accept the Permission” procedure just follow this guide: Google Script Authorization: Review and Accept the Permission Guide
Next, adding a trigger will make sure that the script runs daily and sends the Happy birthday e-card to the peoples having their birthdays.
Add a Trigger
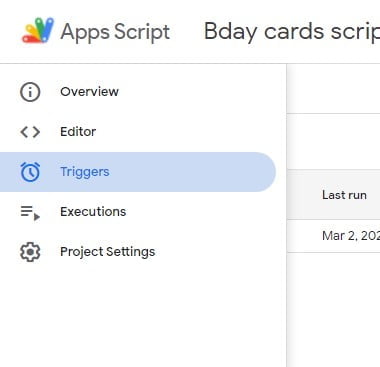
In order for the script to run every day and check if somebody is having a birthday you must use a trigger. To set up a trigger it’s very simple, click on the “Triggers” toolbar item on the left-hand side of the Script Editor to enter the triggers window:
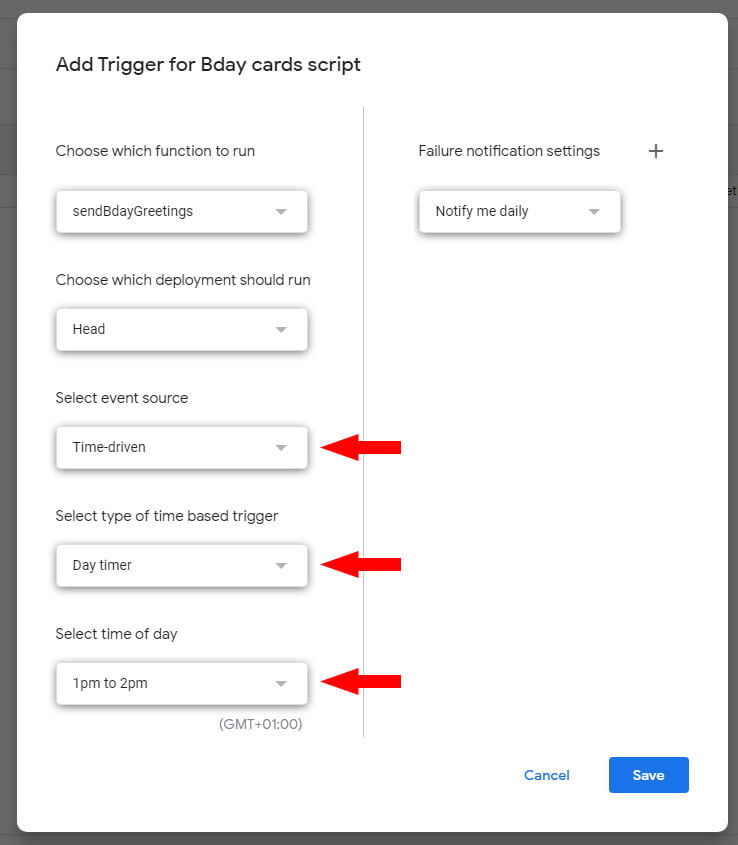
Next, select the “Add Trigger” button, bottom right, and in the trigger dialog box select:
- Select event source: Time-driven
- Select type of time based trigger: Day timer
- Select time of day: 1pm to 2pm
Click on save and that’s it, now you have a Happy birthday ecard system on autopilot. The last thing is to select the template you want and customize it with your logo.
To keep it simple I will include only a tutorial on how to change the logo, but feel free to change whatever you want. You can also add your own template, and if you send it to me I will publish it here for everybody.
You can skip the “How to implement – the not so easy part” part and check the section on how to change the “E-card templates”.
How to implement – the not so easy part
The Script
For everybody else who want’s the script they can grab it from here:
function sendBdayGreetings() {
  // The list of Names and dates of birth is located in the "List of customers" sheet
  var sheet = SpreadsheetApp.getActive().getSheetByName("List of customers");
  lastRow = sheet.getLastRow();
  lastColumn = sheet.getLastColumn();
  // Get the list of customers from the sheet
  BdayList = sheet.getRange(2, 1, lastRow - 1, lastColumn).getValues();
  // Get the today date
  var todayDate = new Date();
  // Get the day from the today date
  var todayDay = todayDate.getDate();
  // Get the month from the today date
  var todayMonth = todayDate.getMonth();

  for (var x = 0; x < lastRow-1; x++) {
    // Get the day from the birthday date
    // from the column D, the 4th column,
    // but the counting starts from 0, so it is the 3th position
    var dayBday = BdayList[x][3].getDate();
    // Get the month from the birthday date
    var monthBday = BdayList[x][3].getMonth();

    // Check if the user has a birthday today
    if (dayBday == todayDay && monthBday == todayMonth) {
      // Get the template from the bdaycard.html
      // Change to bdaycard1 or bdaycard2 if you like the other templates
      var emailMessage = HtmlService.createHtmlOutputFromFile('bdaycard').getContent();
      // Change the Name and the Surname in the Bday template,
      // Get the name from the first column -> position 0 in the list
      emailMessage = emailMessage.replace("Name", BdayList[x][0]);
      // Get the Surname from the second column -> position 1 in the list
      emailMessage = emailMessage.replace("Surname", BdayList[x][1]);
      // Get the Name and the Surname for the email subject
      var subject = "Happy Birthday " + BdayList[x][0] + " " + BdayList[x][1];
      // Get the email address from the list, column C -> position 2 in the list
      var emailAddress = BdayList[x][2];
      // Finali send the email
      MailApp.sendEmail(emailAddress, subject, emailMessage, {
        htmlBody : emailMessage
        });
    }
  }

}
To implement it you have instructions in the script, just adapt it to your data.
To add the HTML templates just add a a HTML file to the script and copy/paste one of the templates. Here is the HTML code for the first, second and the third template.
E-card templates
With the script for the automated e-card sender solution, I have included 3 templates
Here is a preview of the templates:
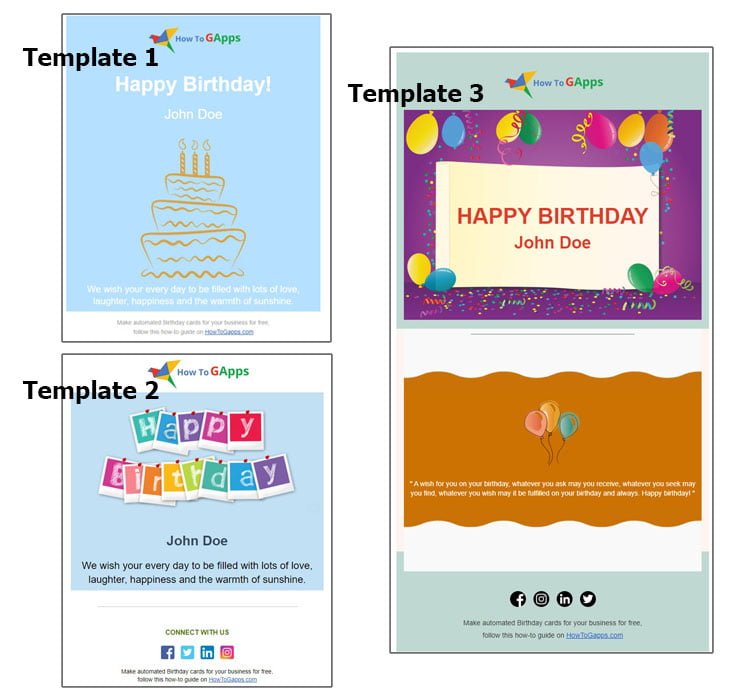
By default, the first template is sent when the script sends an email. It’s very easy if you like to change that, just locate line 27 in the script and change the text “bdaycard” to “bdaycard1” for Template 2 or to “bdaycard2” for Template 3. You can see that the names for the templates here are the names of the HTML files included with the script. So, if you want to add a new template you can just add a new HTML file, paste the HTML code there and change the name in the script.
Here is an example on how to use the template number 2 (bdaycard1.html), line 27.
var emailMessage = HtmlService.createHtmlOutputFromFile('bdaycard1').getContent();Change the logo and the links in the Templates
To keep this article simple I have included the instructions on separate pages. There you will find instructions on how to change the Logo, the links, and the text to your preference. The pages are:
- Template 1 (bdaycard.html): HTML Birthday e-card template 1
- Template 2 (bdaycard1.html): HTML Birthday e-card template 2
- Template 3 (bdaycard2.html): HTML Birthday e-card template 3
To access the HTML code for the templates click on the corresponding template file on the left hand side:
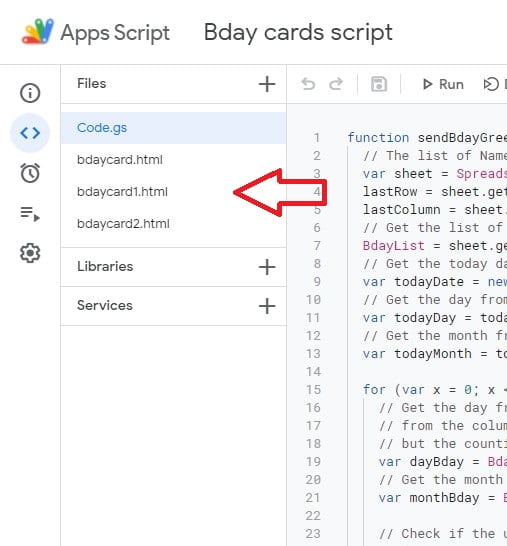
Select the template you intend to use and change the logo, links and the text according to the instructions for that specific template.
Troubleshooting
I have noticed that the script and the spreadsheet can have different time zones and sometimes it will send the email with the happy birthday e-card a day early or a day late. To set the time zone for your spreadsheet is easy, just access the spreadsheet settings from the File menu and change the Time Zone.
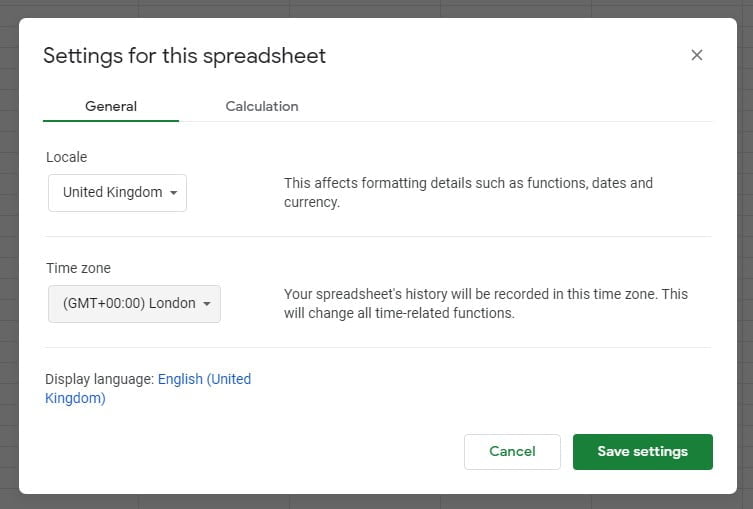
But changing the time zone on the spreadsheet does not change the time zone for the script, so the script will continue to run in it’s own time zone and you could get a date mismatch.
So, now, the question is how to change the time zone for your script. In the old script editor (legacy editor) you can find this option in the Project properties, but this option, for now, is missing in the new editor.
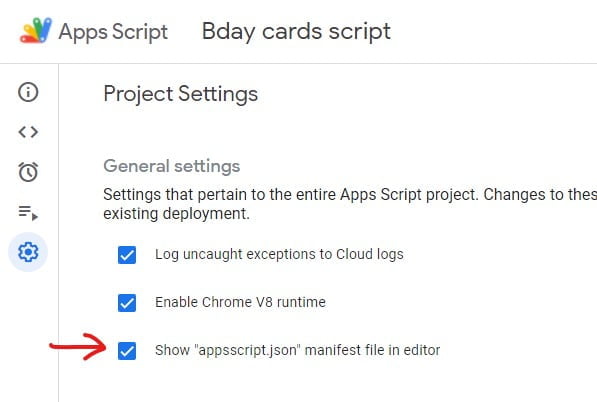
So, to change this option in the new script editor you must access the appscript.json manifest file. To do that, access the Project Settings (the gear icon on the left hand toolbar) and select the option “Show “appsscript.json” manifest file in editor”:
Now, you will see an appscript.json manifest file in the list, together with the script and template files, so select the appscript.json file and replace the time zone with yours.
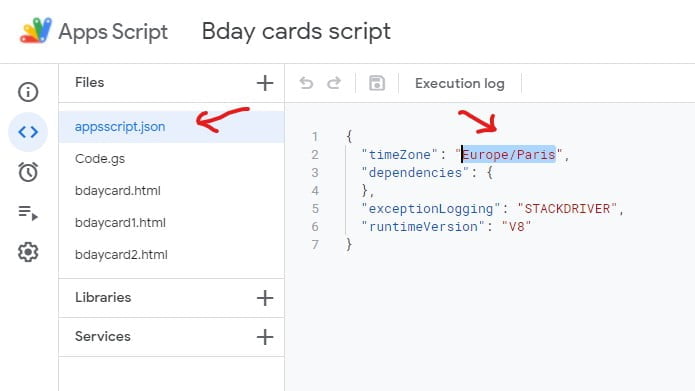
If you don’t know your “TZ database” name for your time zone, just use the selector here to select your location, and then you can copy the time zone name from the text box.
This is it, you can now add your customer and leave it to the script to send them happy birthday greetings on their birthday. If you have any problems just add a comment and I’ll try to help you.
