Sending the same email but with some personalized content to a group of people can be a boring and time-consuming process. The best solution to this is to have all the data in the sheet and use a process called MailMerge. But this option is not available in google sheets. So, in this how-to, we will create a script to send emails from google sheet using the data from the cells. The script will execute on-demand, by clicking on a menu item that we are going to create by using the script.
In this how-to will create a script for the sheet from a previous article: How to create a pre-filled form in bulk, to help send the custom link of the pre-filled form to all the different recipients. But the script is not specific to this sheet and this solution, so with small adjustments you can use it for your own sheet.
Here is the link to the sheet (view-only mode): Create pre-filled links in bulk, where I have created the script. In view-only mode you can’t run the script, you can’t even see the menu item created from the script. But you will need it just to get an idea of the ranges and values I use in the script.
Create a script
The script must be bund to the sheet, so you must create it from there. Select the “Tools” menu from the toolbar and click on “Script editor”. A new tab will open with the script editor, add a name for your script and delete the sample function.
You can find a more detailed how-to on creating a script from this article: Google Spreadsheet Script to create and email a PDF on Form Submission.
The Script to Send Emails from Google Sheet
Here I will try to explain different sections of the script, and how you can modify it to fit your needs. The script will create a menu item so by clicking on it, it will execute the rest of the script and send the mails.
So, let’s start with the script.
function onOpen() {
  SpreadsheetApp.getUi()
    .createMenu('My Menu')
      .addItem('Send email', 'SendEmail')
      .addToUi();
}

function SendEmail() {
  var sheet = SpreadsheetApp.getActiveSheet();
  // The First row containing the data
  var FirstRow = 2;
  // Get the last row that has content.
  var LastRow = sheet.getLastRow();
  // Get the number of rows to process
  var NumberOfRows = LastRow-1;
  // Get the range with data.
  var DataRange = sheet.getRange(FirstRow, 1, NumberOfRows, 6);
  // Get the values from the DataRange
  var Values = DataRange.getValues();
  for (var i in Values) {
    var RowData = Values[i];
    //Get the email from the first column
    var EmailAddress = RowData[0];
    var Subject = RowData[5];
    //Create the message body
    var Message = 'Dear ' + RowData[1] + ',\nPlease fill in the Form: ' + RowData[4];
    MailApp.sendEmail(EmailAddress, Subject, Message);
  }
  // Just an alert to show you remaining email quota.
  // You can delete this if you don't need the alert
  SpreadsheetApp.getUi().alert("Remaining email quota: " + MailApp.getRemainingDailyQuota());
}
Before you copy and paste the script, delete everything in the script editor.
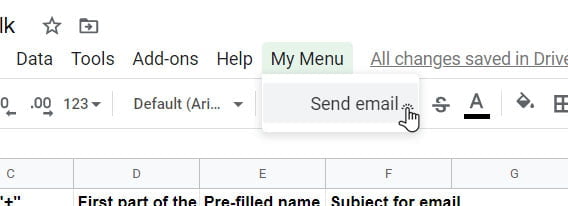
In the first part of the script is located the function “onOpen”, that will execute automatically when you open the sheet. The purpose of the function is to insert a menu Item “My Menu”, with “Send email” as a sub-menu item. We need this so we can execute the rest of the script by selecting the “Send email” from the menu. Here is how it will look in your sheet:

You can change the name of the menus as you prefer, but watch out for the second argument “SendEmail”, on code line 4, it must match the name of the function in the second part (line 8).
The function “SendEmail” uses the class SpreadsheetApp to get the active sheet and get the range containing the data. We know the first row that contains the data (var FirstRow = 2;), but to get the last row we will use the method “getLastRow()”. Now, that we have the range with the data we can use it to go through it and send custom emails with the Class MailApp.
What to change?
If you are using the sheet from the article on How to create a pre-filled form in bulk, you don’t need to change anything. Here is the link to the sheet again: Create pre-filled links in bulk. But, if you are using your own sheet, you need to change the range and location of the data needed for the email.
The first row containing the data is probably the same so you don’t need to change that, and we get the last row automatically, so you don’t need to change that too. The first thing you need to change is the range with the data located on line 17 (method getRange), but only the last argument, in this case, number 6.
var DataRange = sheet.getRange(FirstRow, 1, NumberOfRows, 6);This means that the range will get 6 columns from the given coordinates in the first two arguments. My data is located between columns A and F. So, the last column containing the data is column F, which is the 6th column from the beginning. Count the number of columns containing the data in your sheet and change it.
Next, if in your script the email is located in a different column, you need to change the code on line 23.
var EmailAddress = RowData[0];In my case, the email is located in the first column, so I use the number 0. If the email address in your sheet is located in the second column you must use number 1, if it’s located in the third column you must use number 2, and so on.
Note: Google script marks the first data in the range with 0, so for the first column you must use number 0.
The subject for the mail in my sheet is located in the last column, so I use number 5 in the code line 24 to get it. Change the number to fit your needs.
Next is the text of the message located on line 26.
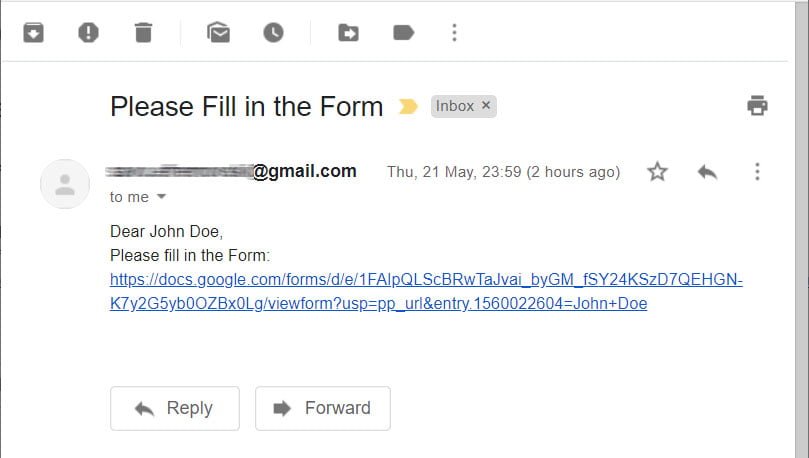
var Message = 'Dear ' + RowData[1] + ',\nPlease fill in the Form: ' + RowData[4];Here I use data from two cells, RowData[1] and RowData[4], with some custom text. Here you can change everything and add only one cell or write a different text. The only thing here that can confuse you is the “\n”, located in the text. Google script uses this to transfer the text in the next line, so you can use this to end a paragraph. The email will look like this:

The last line of code, line 31, will execute after all the mails are send and inform you of the remaining email quota for that day. You can delete this line if you don’t need this kind of info.
Review and Accept Permissions
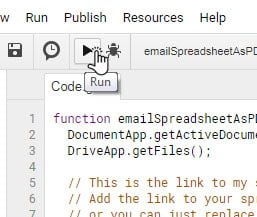
Next thing to do, after you finish adjusting the script, is to run the script. To do that select the “run button” from the toolbar. This won’t execute the “SendMail” function, so it wont send mails, but it will insert the menu item in your spreadsheet.

When you run the script for the first time it will inform you that authorization is required and you have to go through the process of review the permissions. Click on Review permissions and follow the process to accept them.
This process can get confusing, so I have included the instruction in this article: Google Script Authorization: Review and Accept the Permission Guide.
Run the script from the menu
In order for the “SendMail” function to execute and send mails, you need to select the “Send Mail” from the menu in your spreadsheet. So, go ahead and test the script, if all is fine, everybody in the sheet will receive a mail from you.
If you have any problems just add a comment and I’ll try to help you.
