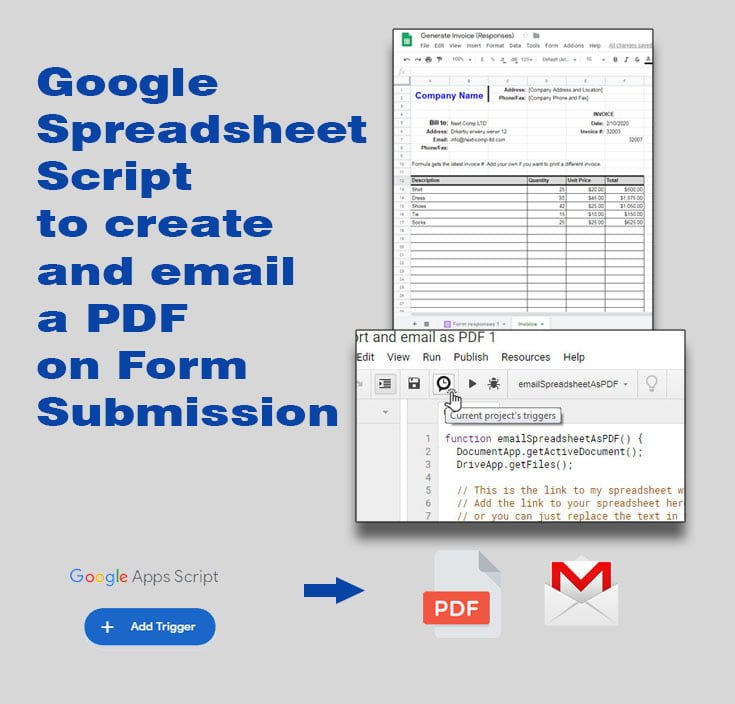
In this how-to, we will use a script to create and email a PDF on Form submission automatically. So, this script is going to be triggered by submitting the Google Form and it will convert the sheet in PDF. In the next steps, the script is going to save the PDF in your Drive and send it as an attachment in an email.
Check this article if you want to AutoFill and Email a Doc Template from a Google Form
In the previous article, we created a system to Generate Invoices using Google Form and Sheets. The system collects the data with a Google Form and sends it to Google Sheet, where we have an Invoice template that is automatically populated using simple formulas. The last step is to save the Invoice template in PDF in Drive and/or send it in an email. Using this script in your spreadsheet you can automate the last step.
Here is the spreadsheet with the invoice template and all the formulas: Generate Invoice (Responses) Sheet. The script is inserted in this spreadsheet and converts the sheet “Invoice”
First, we need to create a script in our spreadsheet and after that, we will add the triggers to automatically activate the script.
How to create a script?
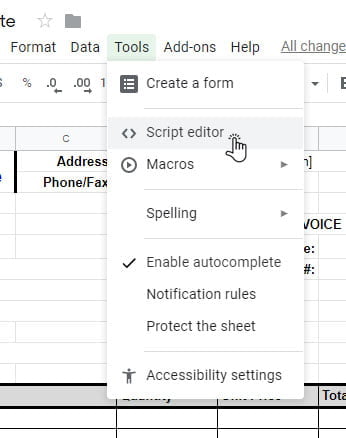
To create a script you must access the Script editor. To do that select the “Script editor” option from the “Tools” menu.
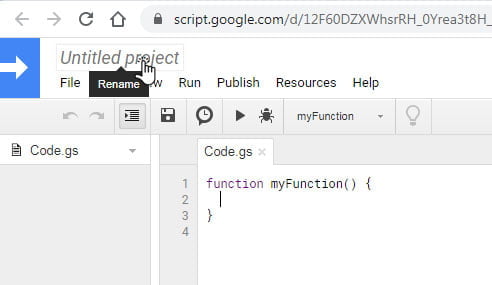
After that, a new tab will open with the script editor app that will enable you to add your script. First, you have to name your project. To do that click on the text “Untitled project” in the top left corner, a new dialog will open and then change the text to something like this: “Export and email as PDF”.
That’s it, now you have a new script, with an empty function “myFunction” and you can start typing or copy/paste the code. The script is in the next part.
The script to create and email a PDF
In this section, I will try to explain the parts of the script that you need to modify to fit your requirements, like the link to your spreadsheet. I will paste the whole code now and explain the parts where you need to add info for your spreadsheet.
So, without further ado, here is the script:
function emailSpreadsheetAsPDF() {
  DocumentApp.getActiveDocument();
  DriveApp.getFiles();

  // This is the link to my spreadsheet with the Form responses and the Invoice Template sheets
  // Add the link to your spreadsheet here
  // or you can just replace the text in the link between "d/" and "/edit"
  // In my case is the text: 17I8-QDce0Nug7amrZeYTB3IYbGCGxvUj-XMt8uUUyvI
  const ss = SpreadsheetApp.openByUrl("https://docs.google.com/spreadsheets/d/17I8-QDce0Nug7amrZeYTB3IYbGCGxvUj-XMt8uUUyvI/edit");

  // We are going to get the email address from the cell "B7" from the "Invoice" sheet
  // Change the reference of the cell or the name of the sheet if it is different
  const value = ss.getSheetByName("Invoice").getRange("B7").getValue();
  const email = value.toString();

  // Subject of the email message
  const subject = 'Your Invoice';

  // Email Text. You can add HTML code here - see ctrlq.org/html-mail
  const body = "Sent via Generate Invoice from Google Form and print/email it";

  // Again, the URL to your spreadsheet but now with "/export" at the end
  // Change it to the link of your spreadsheet, but leave the "/export"
  const url = 'https://docs.google.com/spreadsheets/d/17I8-QDce0Nug7amrZeYTB3IYbGCGxvUj-XMt8uUUyvI/export?';

  const exportOptions =
    'exportFormat=pdf&format=pdf' + // export as pdf
    '&size=letter' + // paper size letter / You can use A4 or legal
    '&portrait=true' + // orientation portal, use false for landscape
    '&fitw=false' + // fit to page width false, to get the actual size
    '&sheetnames=false&printtitle=false' + // hide optional headers and footers
    '&pagenumbers=false&gridlines=false' + // hide page numbers and gridlines
    '&fzr=false' + // do not repeat row headers (frozen rows) on each page
    '&gid=1030891993'; // the sheet's Id. Change it to your sheet ID.
  // You can find the sheet ID in the link bar.
  // Select the sheet that you want to print and check the link,
  // the gid number of the sheet is on the end of your link.

  var params = {method:"GET",headers:{"authorization":"Bearer "+ ScriptApp.getOAuthToken()}};

  // Generate the PDF file
  var response = UrlFetchApp.fetch(url+exportOptions, params).getBlob();

  // Send the PDF file as an attachement
    GmailApp.sendEmail(email, subject, body, {
      htmlBody: body,
      attachments: [{
            fileName: "Invoice" + ".pdf",
            content: response.getBytes(),
            mimeType: "application/pdf"
        }]
    });

  // Save the PDF to Drive. The name of the PDF is going to be the name of the Company (cell B5)
  const nameFile = ss.getSheetByName("Invoice").getRange("B5").getValue().toString() +".pdf"
  DriveApp.createFile(response.setName(nameFile));
}
Before you copy and paste the script, delete everything in the script editor.
Export as XLS or XLSX
A simple replace of “pdf” with “xls” or “xlsx” in “const exportOptions” won’t do the trick. After a couple of requests, I decided to include the solution in the article, just find the “Export sheet as XLS or XLSX” section at the end of the article.
What to change?
First, you need to change the link to the spreadsheet.
The link to the spreadsheet is located in two places. The first one is to target the spreadsheet to pull cell data, in this case, we need to get the email address of the company. In the second place, we need the link to construct an export link to convert the sheet to PDF.
To get the link to your spreadsheet, go to the Chrome tab where you have your spreadsheet open and copy the text from the beginning to the “/edit” text. Check the image:

Now, replace the link in the script, but leave the “/edit” on the first link and “/export?” on the second one.
You don’t need to change the whole link, you can just copy the spreadsheet key, located between “d/” and “/edit” in your link, and just replace that in the script.
All of this is explained in the script in the comments.
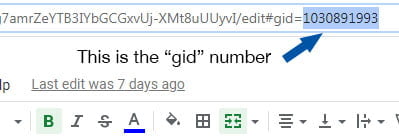
Next, you need to change the “gid” number of the sheet that you want to convert to PDF. The sheet that holds the Invoice Template.
You can find the “gid” number at the end of the link of your spreadsheet. But first, the sheet that you want to get the “gid” for, must be opened. So, just copy the number of the “gid” and replace it in the script.
Customize the script
To execute the script we use two more information from the sheet email and company name.
If you had to change the Invoice template to fit your needs, probably the email and name of the company have changed location. If you are using my invoice template, you don’t have to change anything.
First, you need to change the email that the script uses to send the email to. The code on line 13 gets the email address from the “B7” cell, from the “Invoice” sheet. If your email is located in a different cell or in a different sheet, change it accordingly.
const value = ss.getSheetByName("Invoice").getRange("B7").getValue();The script uses the name of the company as the name of the file. The name of the company is located in the cell “B5”, if it is different for you, just change the cell reference. Also, change the name of the sheet to fit your sheet. You can locate this code on line 55.
const nameFile = ss.getSheetByName("Invoice").getRange("B5").getValue().toString() +".pdf"Review and Accept Permissions
Before we set up a trigger to automatically run the script on Form Submit, we have to run it our self and accept the permissions.
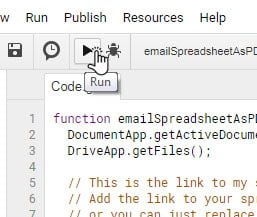
This script accesses your sheet, your email, and your drive, and it needs your consent. So, in order to do that, you need to run your script once from the script editor, by pressing the run icon from the toolbar.
Next, the script will need certain permissions to run, so follow the on-screen instruction to review and accept the permission. If you have any problems check this guide: Google Script Authorization: Review and Accept the Permission Guide.
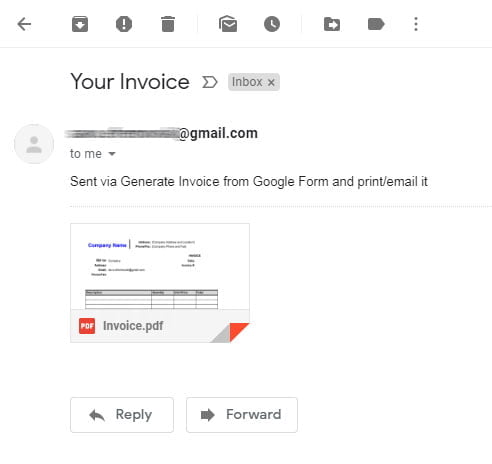
After that, the script will run, and if all is fine, you will receive an email with the PDF in attachment. The mail will look like this:
Also, check your drive for the PDF file.
Add a trigger to auto-run the script
To auto-run this script every time a Form is sent, you need to add a project trigger. This means that every time you add new data through Google Form, this script will run and send the Invoice in an email and save it in your Drive.
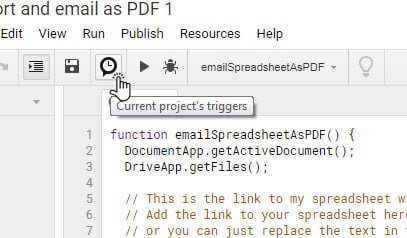
To add project triggers click on the “Current project’s triggers” icon on the toolbar.
A new tab will open with the “Apps script manager” where you can add triggers to run your script. To add a new trigger click on the “+ Add trigger” button on the bottom right of the page.

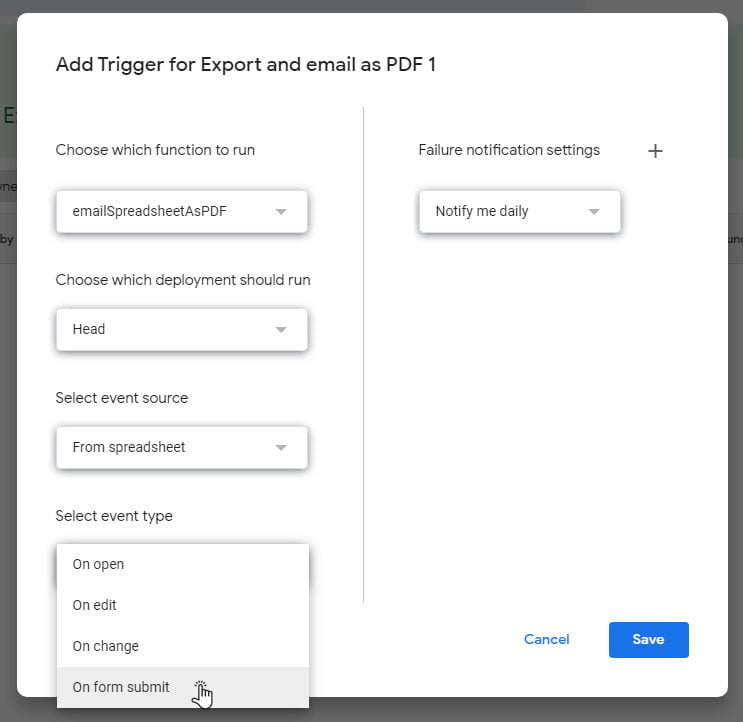
Next, a dialog will open to add a trigger for your app. Here you can find options to select which function to run, but since you have only one function, you don’t have to change this.
The only option you need to change is the “Select event type” to select what will be the trigger to autorun the script. From the list select “On form submit”, and click on “Save”.
After you save the trigger, again you have to review and accept the permissions. Just follow the guide from the previous section. If all is fine, you will see your trigger in the list.
This is it, you can submit the form in order to test the trigger and the script. If you have any problems just add a comment and I’ll try to help you.
Export just a part of the sheet to PDF
I had a lot of requests about this so I decided to add it to the article. Also, it can be very helpful if you have extra rows or columns that you don’t need to be converted into the PDF. So to accomplish this you’ll need to add some extra options in the exportOptions const. Here is how your exportOption const will look like:
const exportOptions =
     'exportFormat=pdf&format=pdf' + // export as pdf
     '&size=letter' + // paper size letter / You can use A4 or legal
     '&portrait=true' + // orientation portal, use false for landscape
     '&fitw=false' + // fit to page width false, to get the actual size
     '&sheetnames=false&printtitle=false' + // hide optional headers and footers
     '&pagenumbers=false&gridlines=false' + // hide page numbers and gridlines
     '&fzr=false' + // do not repeat row headers (frozen rows) on each page
     '&gid=1030891993' + // the sheet's Id. Change it to your sheet ID.
     // Here is the part for selecting range to export to PDF
     '&ir=false' +  //seems to be always false
     '&ic=false' +  //same as ic
     '&r1=0' +      //Start Row number - 1, so row 1 would be 0 , row 15 wold be 14
     '&c1=0' +      //Start Column number - 1, so column 1 would be 0, column 8 would be 7
     '&r2=40' +     //End Row number
     '&c2=5';       //End Column number
Export sheet as XLS or XLSX
As described in the note, a simple replacement of the “pdf” with “XLS” or “XLSX” is going to raise an error. The thing is that all of the options specified there are for pdf and cannot be used for xls or xlsx.Generaly, you have to comment out all the options in the “const exportOptions” from line 27 to line 33 and add just ‘Format=xlsx’. If you can see, I didn’t comment out the line 34 “‘&gid=1030891993” because we need to export only the sheet with the invoice template and not the whole spreadsheet. Check the code, this is what I did:
  const exportOptions = 'Format=xlsx&'+
//    'exportFormat=pdf&format=pdf' + // export as pdf
//    '&size=letter' + // paper size legal / letter / A4
//    '&portrait=true' + // orientation, false for landscape
//    '&fitw=false' + // fit to page width, false for actual size
//    '&sheetnames=false&printtitle=false' + // hide optional headers and footers
//    '&pagenumbers=false&gridlines=false' + // hide page numbers and gridlines
//    '&fzr=false' + // do not repeat row headers (frozen rows) on each page
    '&gid=1030891993'; // the sheet's Id
Next, don’t forget to change the name of the exported file to .xlsx. On line 48 change “.pdf” to “.xlsx”:
fileName: "Invoice" + ".xlsx",And also change the “.pdf” to “.xlsx” on line 55
const nameFile = ss.getSheetByName("Invoice").getRange("B5").getValue().toString() +".xlsx"That’s it, now you will send emails with Excel spreadsheet attached and also save it in your drive in that format.
Export two or more sheets
You can export two or more sheets, but the problem is that they can only be exported as separate PDF files, you can’t combine them in one. If this is what you are looking for here is the adaptation of the script:
  const exportOptions =
    'exportFormat=pdf&format=pdf' + // export as pdf
    '&size=letter' + // paper size letter / You can use A4 or legal
    '&portrait=true' + // orientation portal, use false for landscape
    '&fitw=false' + // fit to page width false, to get the actual size
    '&sheetnames=false&printtitle=false' + // hide optional headers and footers
    '&pagenumbers=false&gridlines=false' + // hide page numbers and gridlines
    '&fzr=false'; // do not repeat row headers (frozen rows) on each page

  var gid =  '&gid=1030891993'; // the first sheet Id. Change it to your sheet ID.
  var gid1 = '&gid=1662536154'; // the second sheet Id.
  // You can find the sheet ID in the link bar.
  // Select the sheet that you want to print and check the link,
  // the gid number of the sheet is on the end of your link.


  var params = {method:"GET",headers:{"authorization":"Bearer "+ ScriptApp.getOAuthToken()}};

  var response = UrlFetchApp.fetch(url+exportOptions+gid, params).getBlob();

  var response1 = UrlFetchApp.fetch(url+exportOptions+gid1, params).getBlob();
Replace the code in the original script from line 26 to 42 and change the gid and gid1 to match your sheets. Now you will have a pdf type Blob in response and response1 variable.
To send mail with two attachments use this code:
  GmailApp .sendEmail(email, subject, body, {
      htmlBody: body,
      attachments: [{
            fileName: "Invoice" + ".pdf",
            content: response.getBytes(),
            mimeType: "application/pdf"
        },
        {
            fileName: "Invoice2" + ".pdf",
            content: response1.getBytes(),
            mimeType: "application/pdf"
        }]
    });
And you can save the two PDF’s in your Drive like this:
  // save to drive
  const nameFile = ss.getSheetByName("Invoice").getRange("B5").getValue().toString() +".pdf"
  DriveApp.createFile(response.setName(nameFile));
  const nameFile1 = "The second.pdf";
  DriveApp.createFile(response.setName(nameFile1));