
Introduction
Google Sheets is more than just a spreadsheet. With Google Apps Script, you can turn any sheet into a fully functional web app that displays your data online.
In this guide, you’ll learn step-by-step how to:
- Build a web app from scratch using Google Sheets and Apps Script.
- Write code to pull data directly from your sheet.
- Create an HTML interface to display your data online.
- Deploy the app and share it using a web link.
By the end, you’ll have a working web app that shows your Google Sheets data in real-time.
Step 1: Set up your Google Sheet
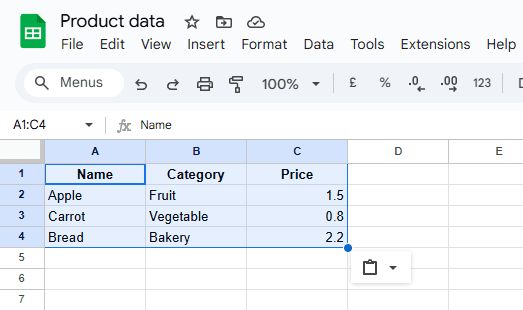
- Open Google Sheets and create a new spreadsheet.
- Name the spreadsheet something like “Product Data”.
- In Row 1, add headers for the data you want to display.
- Fill in a few rows of sample data.
Tip
Whatever you add to this sheet will be displayed in your web app.
Step 2: Open Google Apps Script
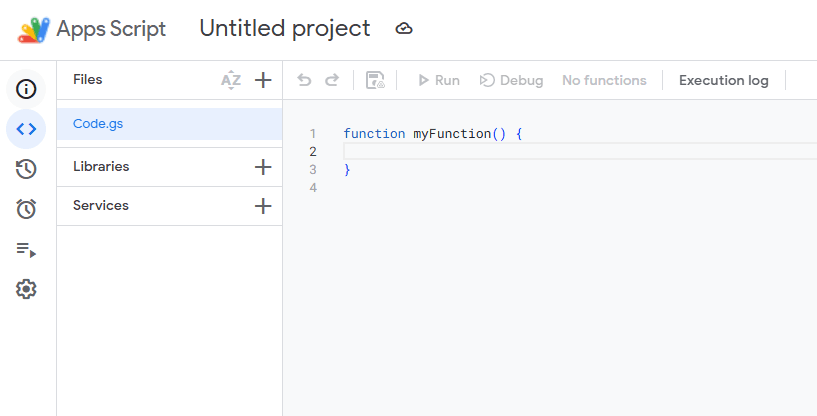
- In the Google Sheet, click Extensions > Apps Script.
- A new Apps Script editor window will open. This is where we’ll write the code that connects your sheet to the web app.
Step 3: Write the Apps Script
Replace any existing code in the editor with the following:
function doGet() {
  return HtmlService.createHtmlOutputFromFile('WebApp');
}

function getData() {
  // Open the active spreadsheet
  const sheet = SpreadsheetApp.getActiveSpreadsheet().getActiveSheet();

  // Get all data, excluding empty rows
  const data = sheet.getDataRange().getValues();
  return data;
}
How it works:
doGet(): This function tells Apps Script what to do when someone opens your web app link. It will load the HTML file we create next.getData(): This reads all the rows and columns from your sheet and sends them to the HTML file so you can display them.
Step 4: Create the HTML Interface
In the Apps Script editor:
- Click the + icon > HTML and name the file
WebApp. - Paste this code into the new HTML file:

<!DOCTYPE html>
<html>
  <head>
    <base target="_top">
    <style>
      body { font-family: Arial, sans-serif; margin: 20px; }
      table { border-collapse: collapse; margin-top: 15px; width: 100%; }
      th, td { border: 1px solid #ddd; padding: 8px; text-align: left; }
      th { background: #f4f4f4; }
    </style>
    <script>
      function loadData() {
        google.script.run.withSuccessHandler(displayData).getData();
      }

      function displayData(data) {
        let html = "<table>";

        // Loop through the data array
        data.forEach((row, rowIndex) => {
          html += "<tr>";
          row.forEach(cell => {
            html += rowIndex === 0
              ? `<th>${cell}</th>` // Header row
              : `<td>${cell}</td>`; // Data rows
          });
          html += "</tr>";
        });

        html += "</table>";
        document.getElementById("dataTable").innerHTML = html;
      }

      // Load data on page load
      window.onload = loadData;
    </script>
  </head>
  <body>
    <h2>My Google Sheets Data</h2>
    <div id="dataTable"></div>
  </body>
</html>
What this does:
- When the page loads, it calls
getData()from the Apps Script. - The data from the sheet is displayed in a clean HTML table.
Step 5: Test your app
- Click the Run button in Apps Script to test if there are any errors.
- If you are prompted to authorize permissions, click Review Permissions, choose your Google account, then Allow.
Note for Beginners
When deploying the app for the first time, you’ll need to allow permissions. Follow this detailed guide on how to review and accept permissions:
👉 Google Script Authorization: Review and Accept the Permission Guide
Step 6: Deploy your web app
This is the most important step: turning your script into a working web app.
- In Apps Script, click Deploy > New Deployment.
- In the popup, click the gear icon and select Web app.
- Under Who has access, choose:
- Anyone (if you want the app public)
- or Anyone with the link (for restricted sharing).
- Click Deploy.
- Copy the web app URL that appears. This is your live app link.
Step 7: Open and share your app
- Paste the URL into a browser.
- Your Google Sheet data should now appear in a live web page.
- Share the URL with anyone who needs access.
Whenever you update the sheet, the web app will show the changes automatically the next time it’s loaded.
Extra Tips
- If you add more columns or rows, the table will adjust automatically.
- To make changes to the design, edit the HTML file’s
<style>section. - If you update the Apps Script code, go to Deploy > Manage Deployments > Redeploy so the changes apply.
Conclusion
You’ve now created and published a live web app that displays data from Google Sheets. This is a powerful way to share data without manually sending files.
With these steps, you can adapt the same process for any type of data: product catalogs, price lists, schedules, or reports.