Thanks to G Suit (Google Apps), gathering data has never been easier. Just create Google Form, send it through email or place it on-line, and you are ready to go.
Google Form is a simple app that will help you in creating an online form so you can collect data from users. You can share the form with email, link or on a website. The data is collected in a single spreadsheet and can easily be analyzed. You can also use the Google Form app to analyze data, generally if you create Quiz form.
Create Google Form
If you are in your Google Drive and you want to create Google Form, click on the “New” button, select More and then click on “Google Forms”.
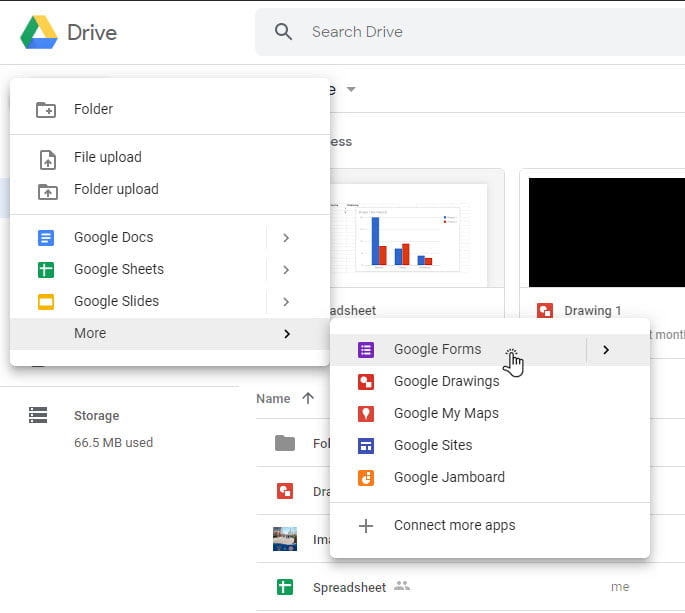
This will create a new Google Form in the folder that is opened in your Drive, so before you create a new Form make sure you are in the right folder. This will make you more organized and keep your form file and spreadsheet file in one location and easy to find.
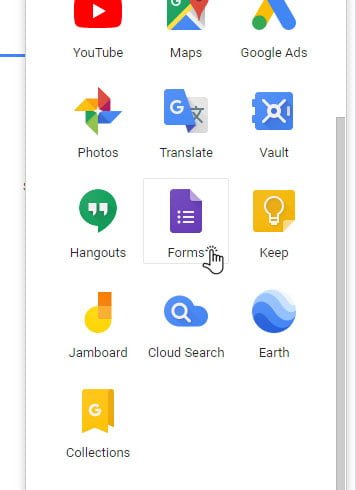
You can also create a Google Form from its own app. To access it just click on the “App Drawer”, top right side on any G Suit app, and click on Forms icon (click on more or scroll down if you can’t see it).
After the app is opened in a new tab, you can start a new form by selecting Blank Form. Here you can also create a Quiz Form or a form from a template. If your organization has templates it will show up here.
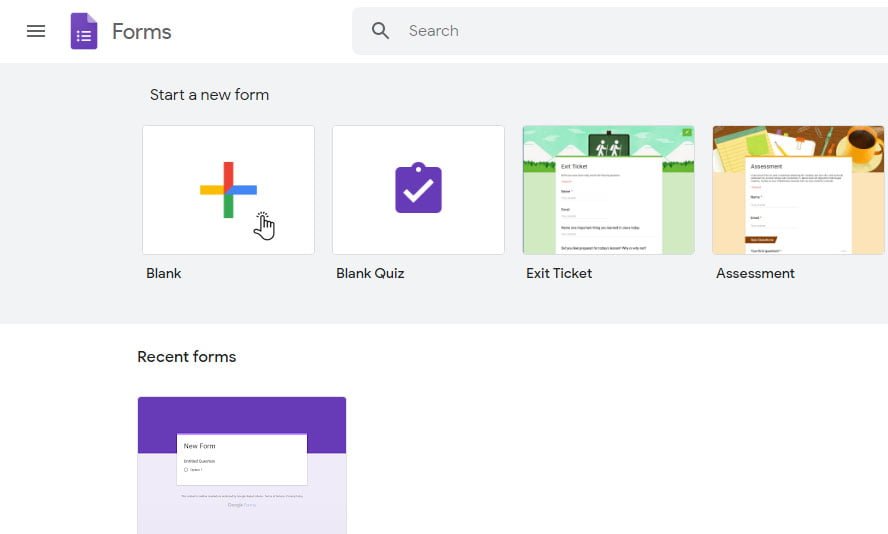
To check more templates click on the “Template Galery” link on the right top side of the Google Forms app. Here you can filter out general and organization templates.
Adding Items in Google Form
You have to understand that Google Form is divided into parts that we are going to call items. Each item can be a question, a title and description, image and a video. Items, or a group of items, can be divided by a Section, which you can use to add a progress bar or you can use it for jumping between sections.
Read more: Different type of questions in Google Forms
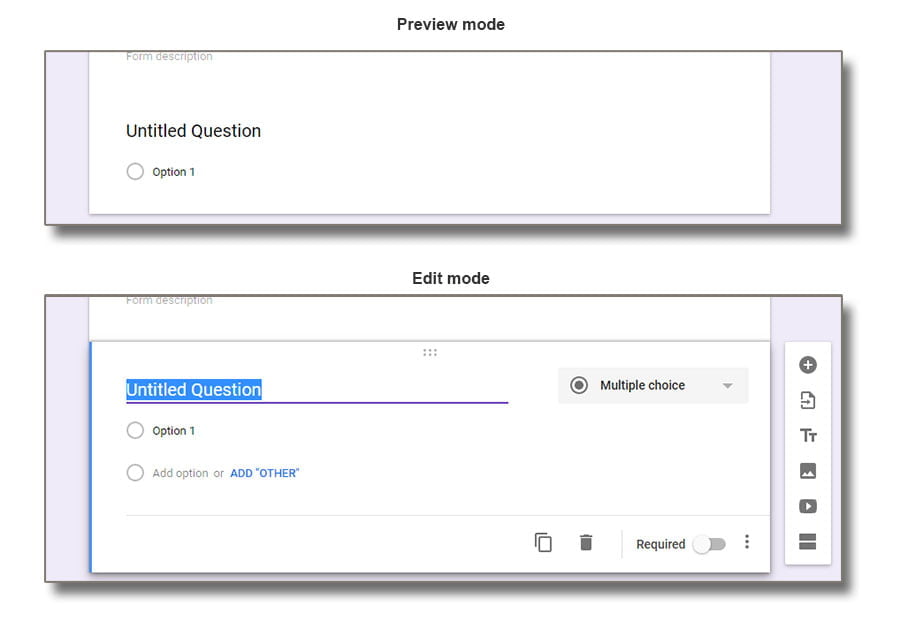
When editing a form, the items in your form will have two states. The first state is a preview mode, and the second one is edit mode. To enter the edit mode you have to select that item by click on it. In the image below you can spot the difference between “Preview mode” and “Edit mode”.
The first item in your form is going to be the title of the form and a description. Add a title that best describes your form and you don’t have to add a description if you don’t need it.
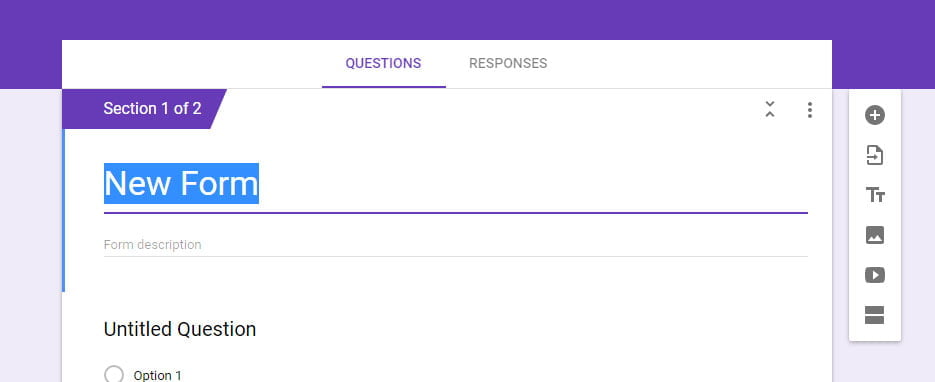
Next, by default, you are going to have a question item, in this case, a multiple answers question. This can be changed to whatever you need, just click on the three-dot menu on the right-hand side of the item.
In order to add a new item or a section, you have to click on the hovering menu on the right side of the selected item. In the next image, you will see all the options available to you. The added item is going to appear bellow the selected item.
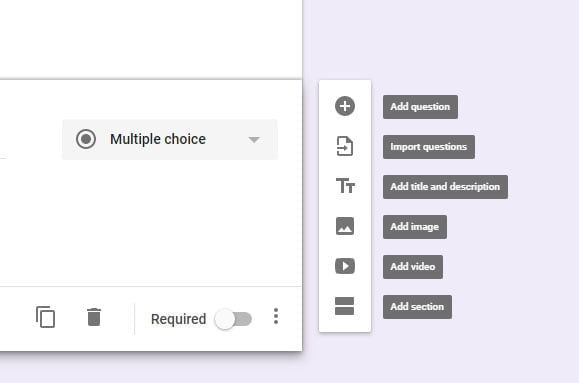
You can find more about the different type of questions that you can insert in Google Forms in this Article: Question Types in Google Forms
Importing Questions in Google Forms
If you already have a similar form created you can easily import questions to save time. It is very easy to use import, just click on the second option “Import questions”, available from the hovering menu on the right of the selected item (check the previous image). After that, a dialog is going to appear to let you chose the Form that has your questions.
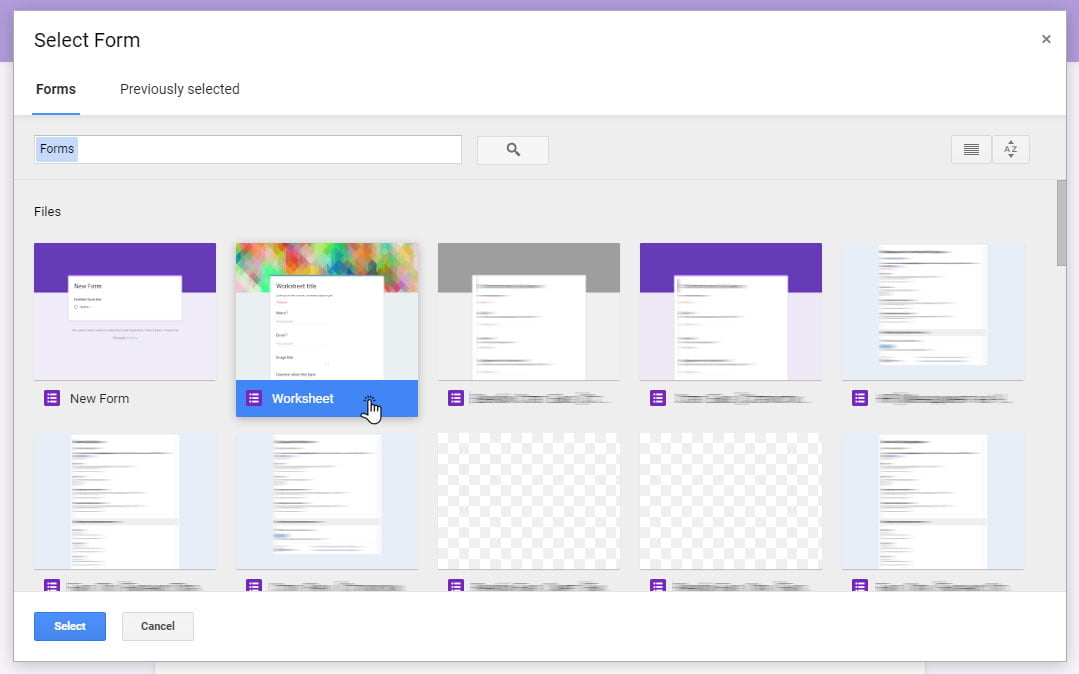
Note: The questions that you are going to import will appear after the selected item, so it is better to select the intended location then to rearrange them later.
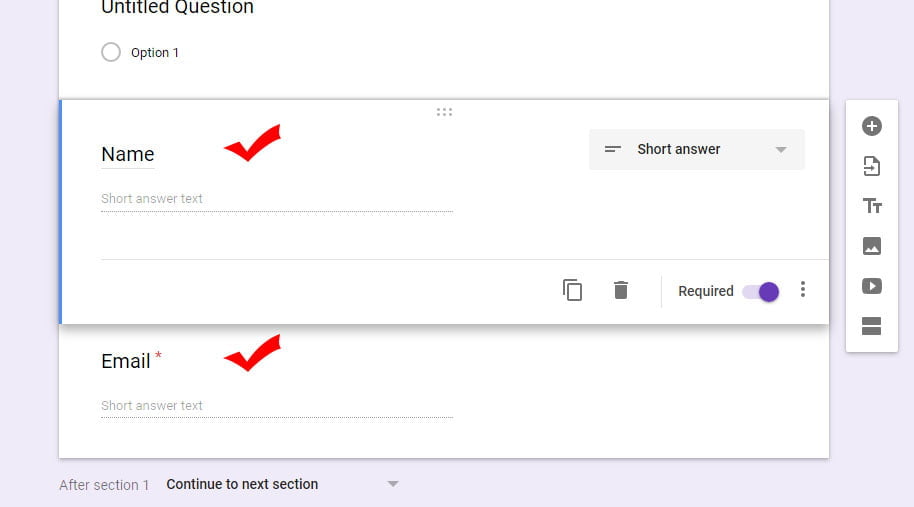
The items (questions) from the selected Form are going to appear on the left-hand side on the Form you are working with, like in the image below.
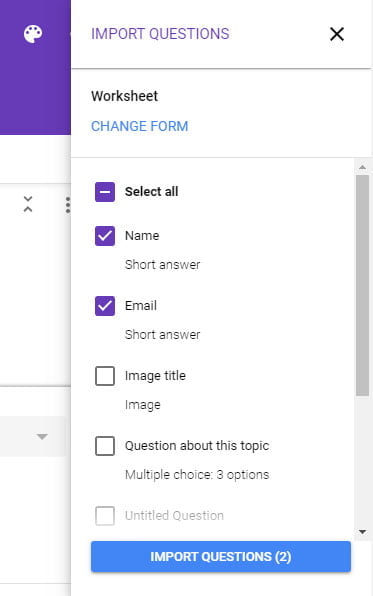
Google Forms are going to let you chose which questions you like to import, and after selecting them click on the “IMPORT QUESTIONS (?)” button to add them to your Form. As you can see, I have selected the Name and Email questions to import and in the next image, they are going to appear after the selected item.
Adding sections
Sections are used if your form is too long and you want to divide it into parts, or if you want to skip questions depending on answers.
The first option, to divide it into parts, will allow you to display only questions from one section at a time. If you want to go forward or backward between sections you can use the “Next” and “Back” buttons at the bottom of the displayed section. You can also select “Show progress bar” from the settings menu to display the progress bar on the right side of the buttons.
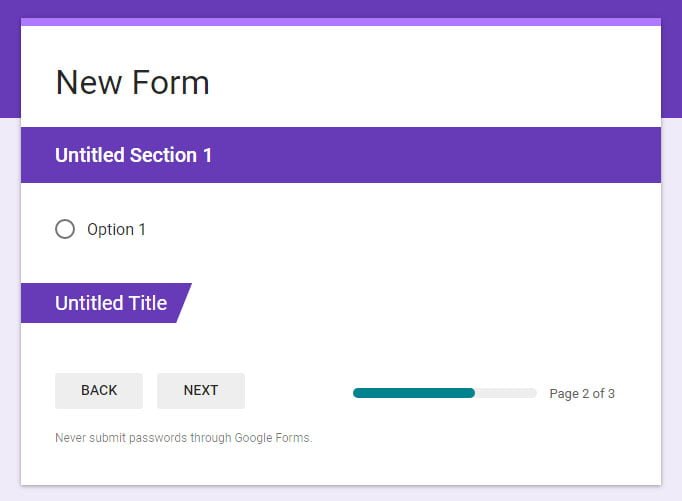
The second option, to navigate through Google Form, will help you to display a different section depending on the answer provided by the user. So, depending on the option selected by the user from a question from that section, you can skip to an intended section. For example, if a user selects that he doesn’t own a car you can skip the section with the questions about the car.
In the next image, you can see a multiple-choice question with a specific action depending on the selected answer. If you want to see these options you have to select the “Go to selection based on answer” from the three-dot menu at the right-bottom side of the question item.
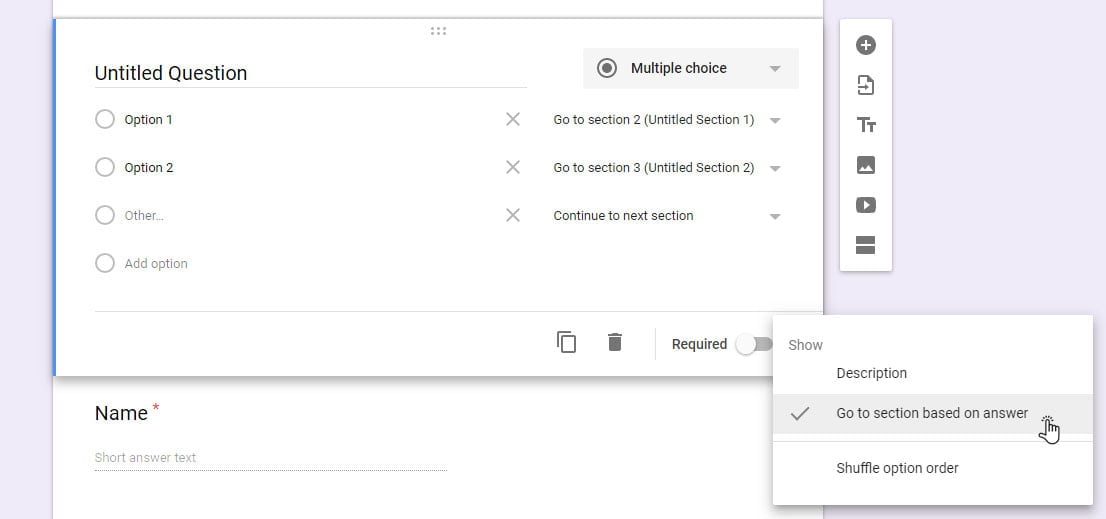
Note: Not all questions can have the option to skip or go to a specific section.
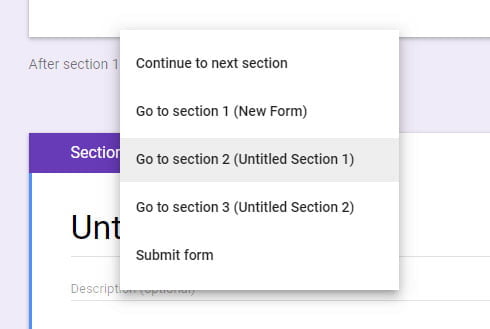
All sections have a title and a description and also an option to select what happens after clicking next. You can find this option at the end of the section and you can select from an “After section” dropdown list, what will happen next. You can see in the next image I have several options, from jumping between different sections “Go to section ?” to submitting the form.
More options
In this article How to Google Form Responses, I’m going to explain the different ways the data is collected and analyzed, exported and also how to create a spreadsheet for further analyses.
For configuring the settings on Google Forms please check this article Google Forms Settings.
