
A Free Ticketing System Using Google Sheets – How to Use It and Get Your Own Copy
You don’t require expensive software to track support tickets, IT incidents, or internal tasks. This simple ticketing system runs entirely on Google Sheets and utilizes Google Apps Script for an easy web interface. It runs on any Google account—be it Gmail or Google Workspace—and directly in your browser or phone. There are zero installations, no backend services, and no subscriptions.
What You Need
- A Google Account (Gmail, Workspace, or Education)
- A browser (you can use it on a mobile device)
- Google Sheets and Apps Script (included in all Google accounts)
There’s nothing else to install. You just copy the spreadsheet and follow a few clicks to deploy it as a web app.
How the Ticketing App Works
This web app works fully with Google Sheets and Apps Script. After it is set up, it shows a simple dashboard in your browser or phone. Each ticket is kept as a row in a sheet, and you can handle tickets without needing any extra tools.
To test the web app follow this link (sending emails in this version is disabled, also don’t add your personal info while testing): https://howtogapps.com/go/?to=https%3A%2F%2Fscript.google.com%2Fmacros%2Fs%2FAKfycbw68C23VKpR-LmnDPOFn_XGOLelM4OUlTpyTYfC0ernfYxocIHrpn5L1aHAviNNkIgKPA%2Fexec&label=Test%20the%20app
Data in the web app will reset once a week.
Here’s what goes on behind the scenes:
- A user opens the app in a web browser and sends a new support ticket using a form.
- The ticket is stored in the spreadsheet and assigned a unique ID such as
T-1,T-2, etc. - The assigned staff member and the user both receive an automated email notification when the ticket is created.
The support team can change the ticket status or add comments in the detail view. - Comments are tracked chronologically, with timestamps and author info.
- When a ticket is closed, it’s moved to the “Closed Tickets” view but kept in the same sheet.
- You can reopen closed tickets if necessary, which changes their status and enters a history comment.
- Staff members are controlled on a different page in the application where you can add or delete staff.
All of your data remains in your spreadsheet – no external servers are utilized.
Following are the images that illustrate how every component of the system appears and functions in reality:
Ticket Dashboard
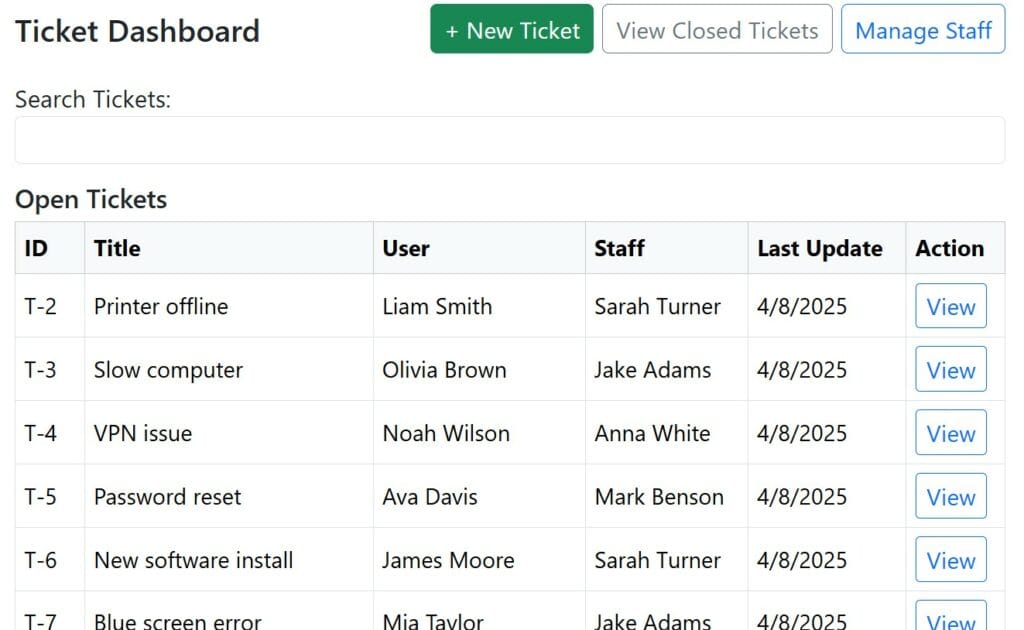
- Lists all open tickets
- Search bar to filter by ID, title, user, or staff
- Paginated view (15 tickets per page)
- Action button to view ticket details
New Ticket Form
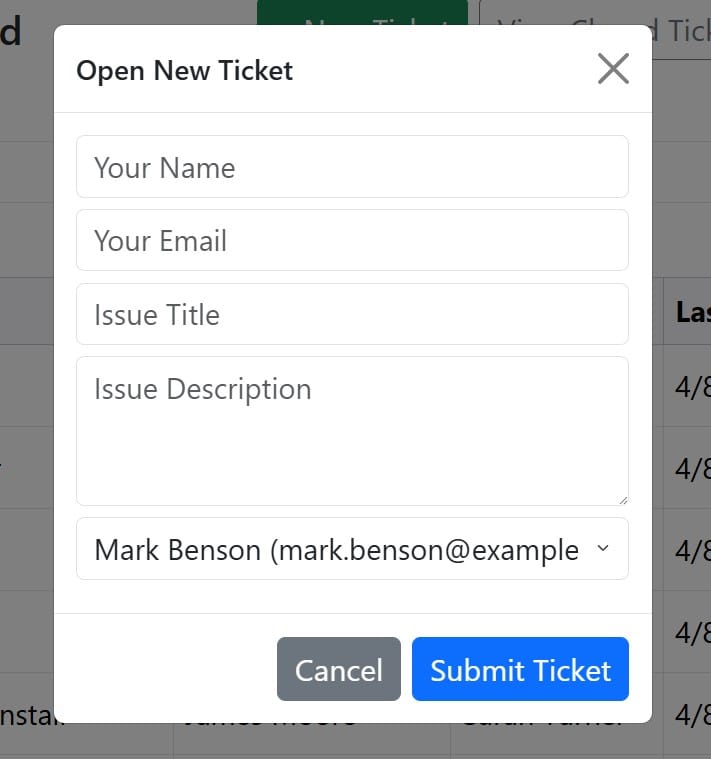
- Opens from a button on the dashboard
- Users enter their name, email, issue title, and description
- Assigns to a staff member from a dropdown list
- Submits and stores ticket in the Google Sheet
Ticket Details View
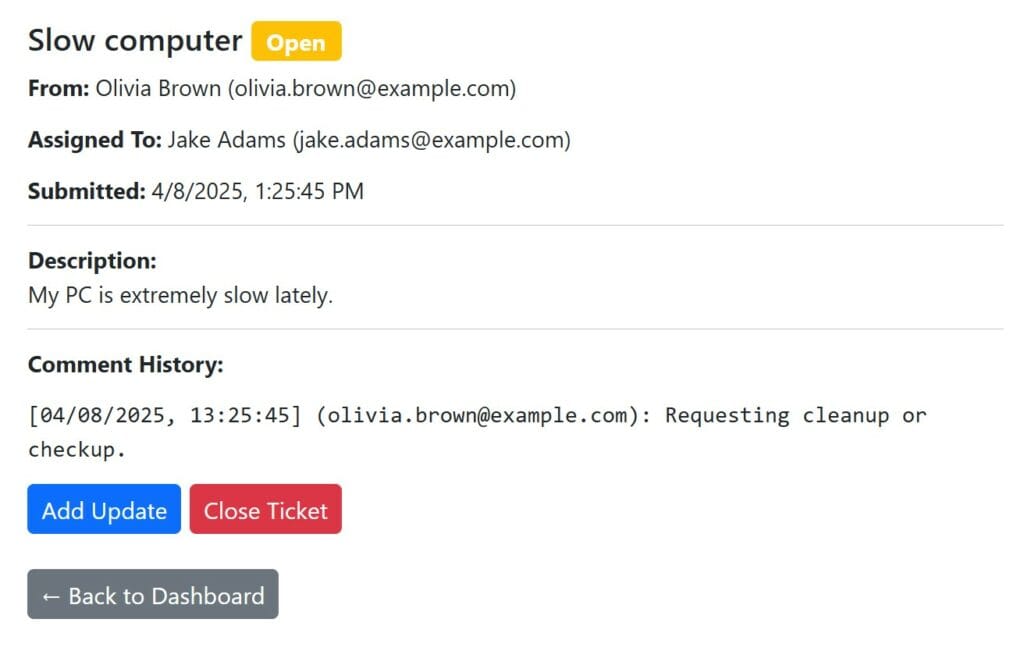
- Shows full ticket data and comment history
- Allows adding updates and closing the ticket
- Displays structured timestamped communication
Closed Tickets View
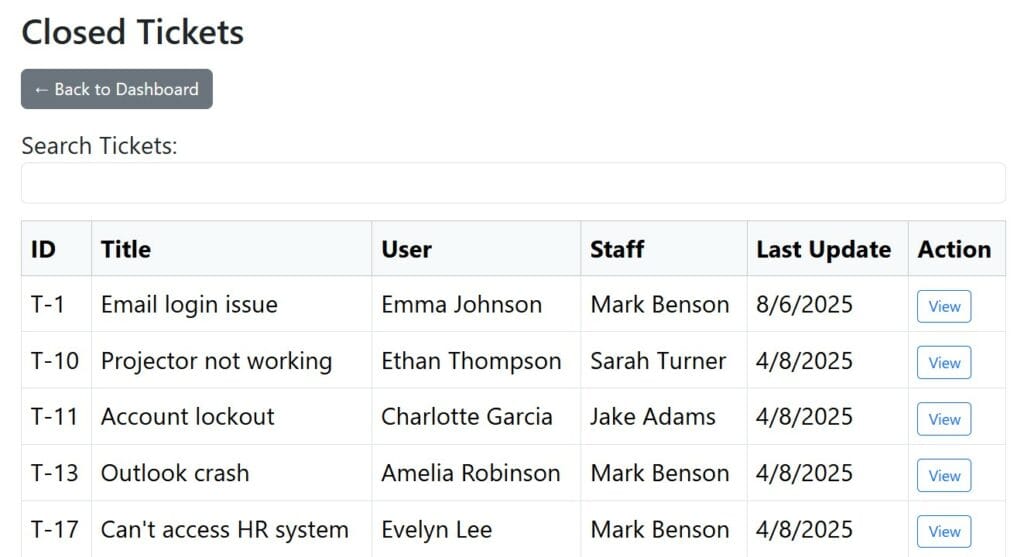
- Lists all closed tickets
- Includes search and pagination
Manage Staff
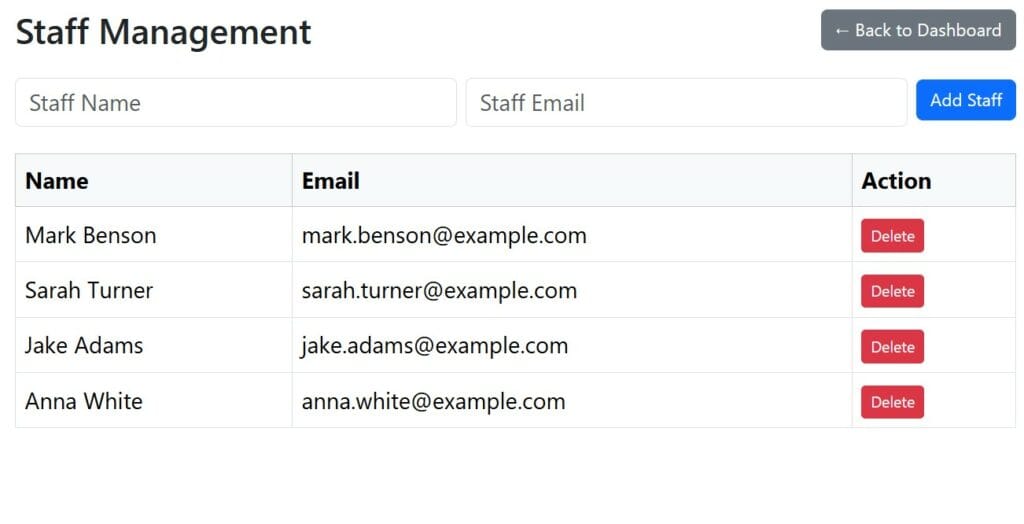
- Add or delete staff entries (name and email)
- All changes update the dropdown in New Ticket
- Accessible from the dashboard via a button
How to Get the App
Follow these steps to copy and run the app in your own Google Account.
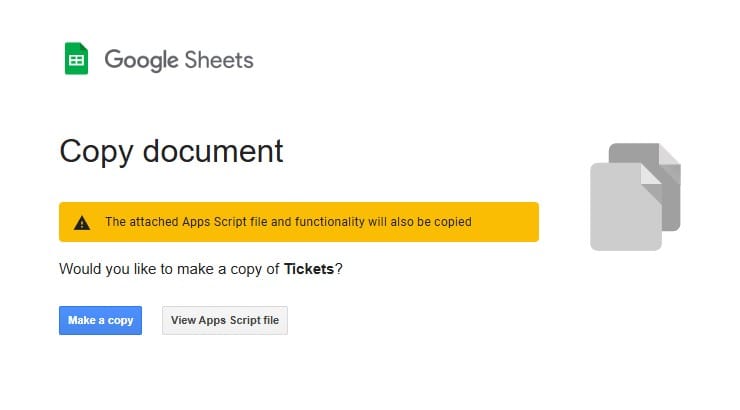
Step 1: Copy the Spreadsheet
Use this link to copy the spreadsheet to your Google Drive:
Make a Copy of the Ticketing App Spreadsheet
You’ll see a confirmation window — just click “Make a copy”.
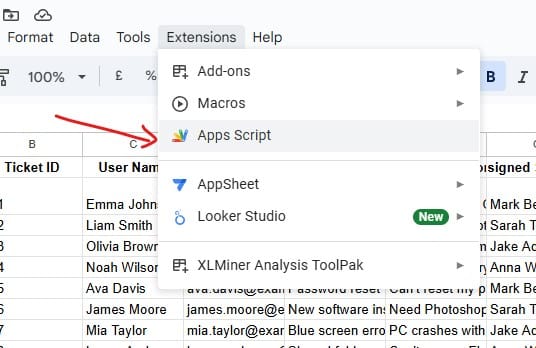
Step 2: Open Apps Script
In the copied spreadsheet, go to:
Extensions → Apps Script
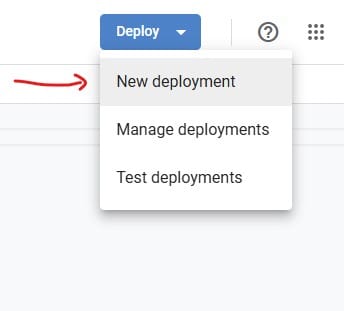
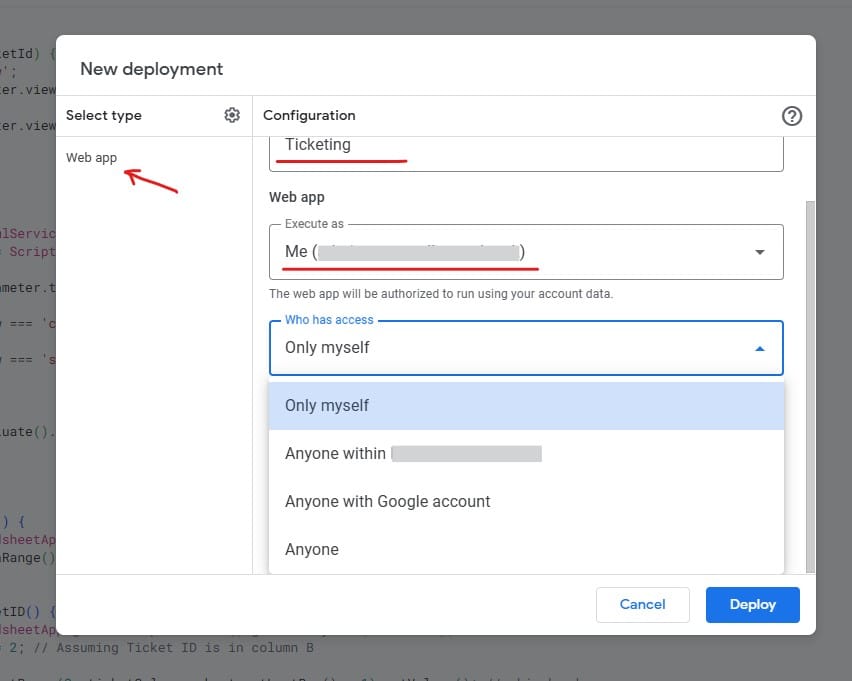
Step 3: Deploy as Web App
In the Apps Script window, click Deploy → New Deployment
- Select Web App
- Add a name in the Description
- Set:
- Execute as: Me
- Who has access:
- Only myself – only you can use it
- Anyone – anyone with the link can use it
- Anyone within “your domain” – only users in your Workspace
- Anyone with Google account
Step 4: Authorize the Script
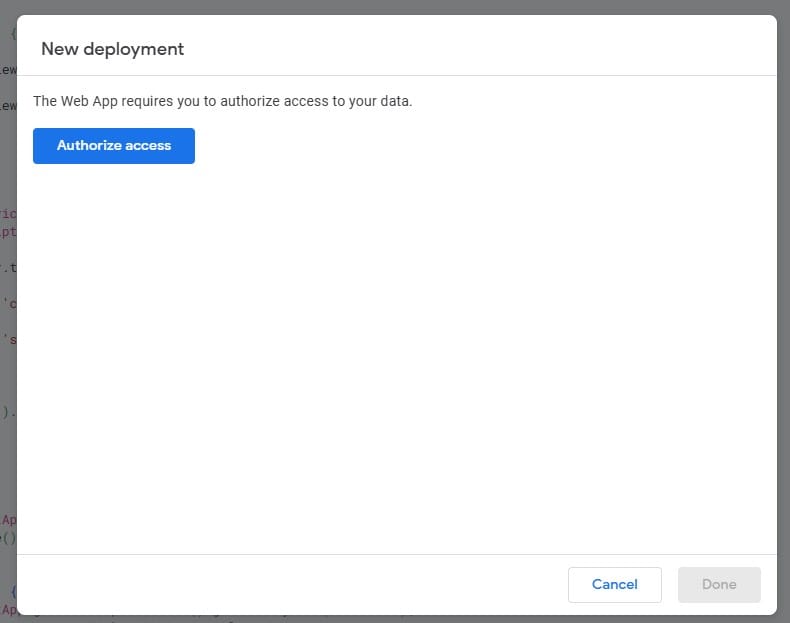
You’ll be prompted to review permissions. It will ask to:
- View, edit, create, and delete your Google Sheets
- Send emails as you (used to notify assigned staff)
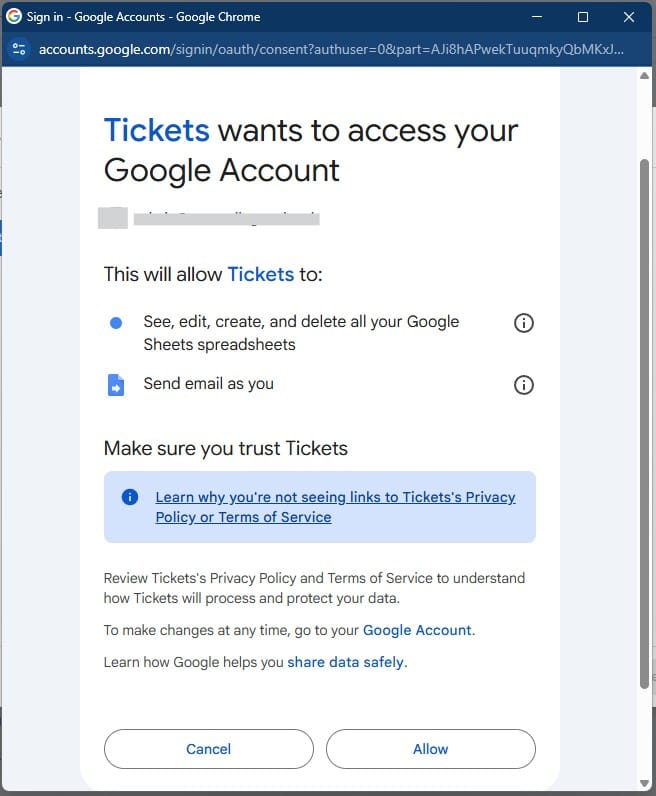
For detailed instructions on allowing permissions, see this guide: How to accept Google Script permissions
Step 5: Get the App URL
After authorization, the deployment window will show your live app URL.
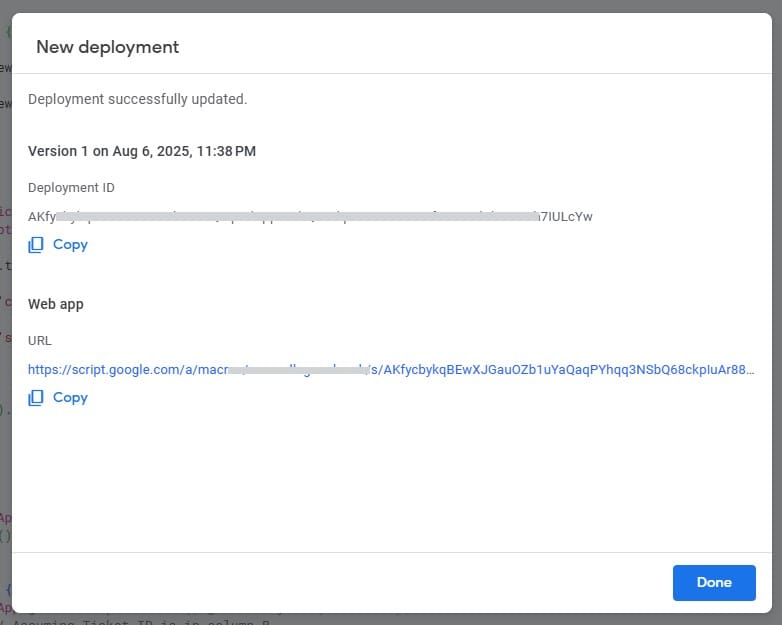
You can now share this link or bookmark it for future access. It’s mobile-friendly and works anywhere you have internet.
Final Notes
This is a simple but effective way to track internal requests or support tickets. You can customize the sheet or extend the script to add features like categories, priorities, or notifications.
This ticketing system gives you control and transparency without the complexity of traditional systems.